|
This This document is intended to give non-expert users (DBPrism,
Cocoon, OC4J) a head-start, so they can see DBPrism/OC4J in action. Some
text of this document is directly copied from the document OC4J.html,
which was written by Marcelo F. Ochoa - mochoa@ieee.org, the creator of
DBPrism.
This manual is not intended as a general
installation guide for DBPrism: only use the versions of the software
components as they are given below or you're in for a
disappointment. The goal of this manual is to set up a working DBPrism
configuration on a Linux machine as quickly and easily as possible. This
means that certain things you might want (such as setting up new DADs)
are outside the scope of this document. Refer to the standard DBPrism
documentation for these topics. If you have comments/remarks, please
email them to Roel Franken, rfranken@importalis.com,
so that I can improve this document.
DBPrism is a servlet that can be used in two modes:
- A mode emulating the Oracle Apache mod_plsql. This will allow you
to execute stored procedures in the Oracle database through the
DBPrism servlet.
- A mode that makes DBPrism behave as an XML producer for Cocoon.
Instead of outputting directly to the web-server, XML is directed
towards Cocoon, using Cocoon as an XML publishing framework.
In this installation manual we will start to describe how the general
components (such as Java) must be installed. Then the installation of
each of these modes is described. .
|
The installation described in this document is restricted to a
particular configuration of software modules (in bold), which are
defined in the table below:
|
Software
|
Version
|
Where to get it
|
|
DBPrism
|
2.0.0-alpha1
|
HERE
|
|
Cocoon
|
2.0
|
...from Apache.org: HERE
|
|
OC4J
|
1.0.2.2.1
|
...from Oracle Technet: HERE
|
|
Java Runtime Environment
|
Java(TM) 2 Runtime Environment, SE (build
1.3.1_02-b02)
|
...from Sun Corp: HERE
|
| Linux Kernel
|
Linux 2.4.10-4GB
|
-
|
| Oracle rdbms
|
8.1.7/9.0.x
|
...from Oracle Technet:
|
| Apache
|
1.3.20
|
...from Apache.org
|
 | Note: For the software objects in bold, it is critical to select
exactly the mentioned version. For instance, if you use Cocoon 2.0.1
this installation will fail! The installation of Linux and Oracle is
outside the scope of this document. Also, this manual will not work
with OC4J 2.0 (sorry!). |
|
|
It is wise not to install the DBPrism-components as user
root. On a multi-user OS, such as Linux, create a user
for running the OC4J container. In this installation manual the
OS-user oracle is used (which comes pre-installed with
the SUSE distribution), that has as its home directory /opt/oracle.
(If you have to create the oracle account yourself, make sure it
belongs to primary group oinstall, secondary
dba).
Using DBPrism (in either mode) requires installing a number of
general components. Apart from Linux (OS) and Oracle (rdbms), which
are not described in this document, the following general software
components must be installed:
- a Java Runtime Environment (JRE)
- The Oracle Container for Java (OC4J)
- Apache webserver
| Setting up the Java Runtime Environment |
|
The Java distribution from Sun comes as a self-extracting
BIN-file or a TAR-archive. Download the distribution (see " Table 1 : Software Configuration.")
and install (as user oracle) it by following the
instructions on:
http://java.sun.com/j2se/1.3/install-linux-sdk.html.
In this example we install Java in /usr/local/jdk1.3.1_02.
If you want it there too and you 're using the BIN-file, do
the following:
- Log on as oracle
- Download the BIN-file and put it in /usr/local
- Extract. The directory jdk1.3.1_02 with subdirectories is
created
Now modify the .profile file for the user oracle. By
adding the following lines, the oracle user uses the
correct JRE:
 | | |
|
PATH=/usr/local/jdk1.3.1_02/bin:$PATH
JAVA_HOME=/usr/local/jdk1.3.1_02
| |
| | |
Log on again or do a
oracle@linux:~>. ~/.profile
command to reload the profile settings.
Then issue the
oracle@linux:~>which java
command to verify the correct JRE settings.
The result should be:
/usr/local/jdk1.3.1_02/bin/java
|
| Setting up the Apache webserver. |
|
To check if the Apache webserver is running, load the following
URL in the browser:
http://<your host>/index.html.en
If you see the test page then apache is running: go to step " Setting up the OC4J Servlet
Container". If you don 't see the test page, this can
mean any of the following:
- That Apache is installed but not running
- That Apache is not installed
To find out which of the two is the case, do the following:
Connect as root (by default Apache runs under the
root user):
oracle@linux:~>su root
Issue the command:
linux:~ # apachectl
If you get an error like:
linux:~ # bash: apachectl: command not found
Then Apache is not installed and you have to install it from the
Linux cdrom or download in from the site mentioned above. Refer to
the documentation provided from Apache Org. to install it.
If you get the help information for apachectl, then apache is
installed but not running. Start Apache by issuing the command:
linux:~ # apachectl start
Result:
/usr/sbin/apachectl start: httpd started
|
| Setting up the OC4J Servlet Container |
|
The Oracle9iAS new J2EE container, OC4J, is based on some
technology licensed from Ironflare Corporation, which develops the
OrionServer: one of the market's leading J2EE containers. This
container is written entirely in Java that executes on the standard
Java Development Kit (JDK) Virtual Machine (JVM).
Installing OC4J requires the following simple steps:
- Unpack the distribution - unzipping the distribution file
- Install - through the java virtual machine
- Start OC4J
| Unpacking the distribution |
| Configuring Apache to re-route to OC4J |
|
|
| Setting up the MOD_PLSQL emulation mode |
|
Now that the general components are set up, we can proceed with the
installation of the MOD_PLSQL emulation. In this mode the DBPrism
servlet is used to call stored procedures in the (Oracle) database and
outputs the result directly to the webserver.
| Installing the /dpls zone |
| Configuring the server.xml |
| Configuring the default-web-site.xml |
|
The default-web-site.xml is located in the
$ORACLE_HOME/j2ee/home/config directory. Add the
following line:
<web-app application="dpls"
name="dpls" root="/dpls" />
(Again: Make sure you do not put this between the comment
tags.)
This line tells to OC4J server which directory is used as a
mount point for this application
|
|
| Installing a Database user for testing |
|
This can be done in two ways:
- Simple: just create one stored procedure containing HTP.P
commands to check the installation of the dpls zone
- Eleborate: Use the DBPRISM scripts to install the SCOTT
account and test the demo?s
(You can do both of course)
| A more elaborate test: The Prism Demos |
|
Before you can test the demos for this zone, you must install
the scott user in the target database by executing
all the following SQL-scripts:
As dba: /opt/dbprism/plsql/scott.sql:creates user
SCOTT with the necessary privileges
Connect as SCOTT and execute:
ALTER SESSION SET NLS_DATE_FORMAT = 'DD-MON-YY';
and
ALTER SESSION SET NLS_LANGUAGE=AMERICAN;
(Why? Because Oracle put dates in the summit2.sql
script (see below) like '04-MAR-90 ' which might cause an
error if your language is not American.)
Run summit2.sql: populates the SCOTT schema with
the necessary tables etc. Comes with the database installation.
Look for this script under $ORACLE_HOME on the database server
(like ../RDBMS/demo).
Run /opt/dbprism/plsql/xtp.sql
Run /opt/dbprism/plsql/doctbl.sql
(there is an exit in this script, which is not nice)
Run /opt/dbprism/plsql/demo.sql
Run /opt/dbprism/plsql/show_open_sessions.prc
Run /opt/dbprism/plsql/show_open_cursors.prc
Modify the prism.properties file located on $ORACLE_HOME/j2ee/home/applications/dpls/dpls
directory: Set the DAD for sample to the following
settings:
| | |
|
sample.dbusername=scott
sample.dbpassword=tiger
| |
| | |
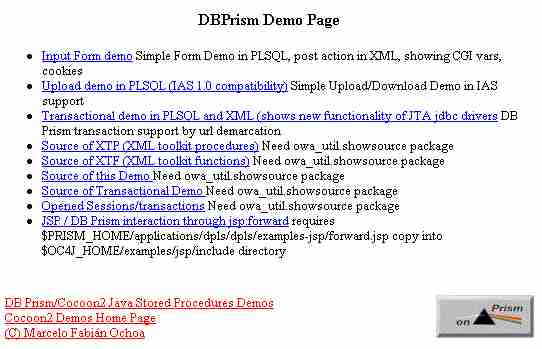
Now in your browser request:
http://<your_server>:8888/dpls/sample/
and you will see the DBPrism Demo Page:
|
|
|
| Setting up the COCOON2 XML producer mode |
|
Now that the /dpls zone is working correctly, we are going to set
up the mode for communication with COCOON2. This means setting up a
complete new application in the application server (OC4J), that is
again copied from the DBPrism installation and deployed by means of an
EAR-file.
| Installing the correct JAR-files in the OC4J library |
| Adding a new zone to OC4J |
|
This involves the following steps:
- Make an EAR file distribution
- Edit the server.xml file
- Edit the default-web-site.xml file
| Make an EAR file distribution |
|
As described in Creating the EAR file this is done by a script
that comes with the installation. For the dbprism zone this script
is called:
$PRISM_HOME/applications/build-dbprism.sh
Execute this script while on the $PRISM_HOME/applications
directory. It will pack all files required by the zone. In the
$PRISM_HOME/bin directory a file called dbprism.ear
will be created.
Copy this file to $ORACLE_HOME/j2ee/home/applications.
This dbprism.ear file (like dpls.ear) includes a private copy
of the prism.jar. It also includes a cocoon.jar which is based on
COCOON2 and located in the $ORACLE_HOME/j2ee/home/applications/dbprism/dbprism/WEB-INF/lib
directory and a private copy of prism.properties file located in
$ORACLE_HOME/j2ee/home/applications/dbprism/dbprism.
|
|
(See:Configuring the server.xml)
Add the following line for the /dbprism zone:
<application name="dbprism"
path="../applications/dbprism.ear" />
|
| Edit the default-web-site.xml file |
|
(See:Configuring the default-web-site.xml)
Add the following line for the /dbprism zone:
<web-app application="dbprism"
name="dbprism" root="/dbprism" />
|
| Testing the DBPrism Cocoon interaction |
|
| Problems you can run into |
|
|